File Attachments
On this page:
- Attaching a new file to a page
- Attaching an existing file from the library to a page
- Linking the file within the page body
- Accessibility considerations
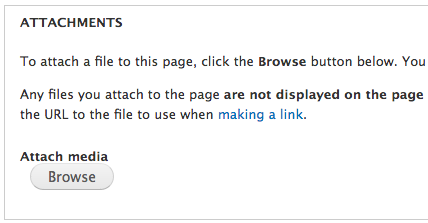
When editing a page or certain other types of content, there is a field following the body for adding attachments to that page. Use this field to upload files that are not images such as PDF, Word document, Excel spreadsheet, PowerPoint presentation, etc. to the web server.
Click Browse to open the media browser, where you can upload a file or select an existing file from the library.
Attaching a new file to a page
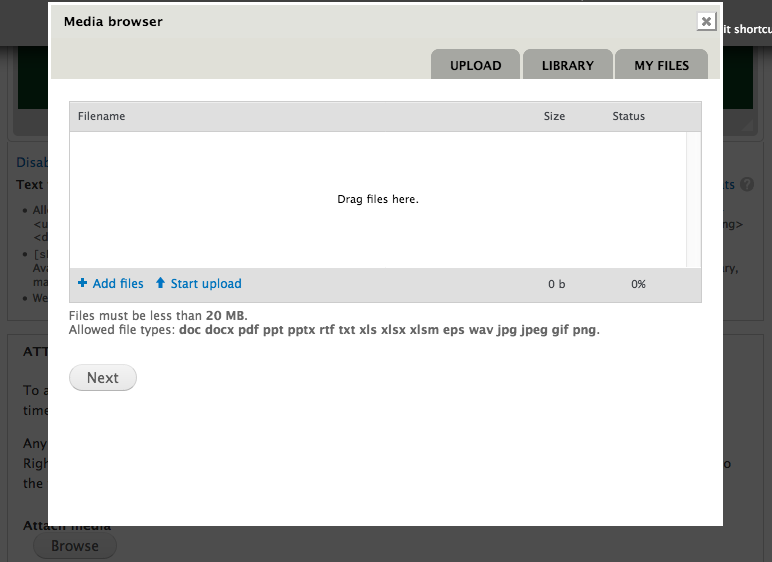
With the media browser open, you are first presented the option to upload new files to the server. You can either drag and drop files from your desktop or an open file folder to the specified area, or click Add files to browse for files on your computer. Clicking Start upload is optional; this will happen automatically when you click Next.
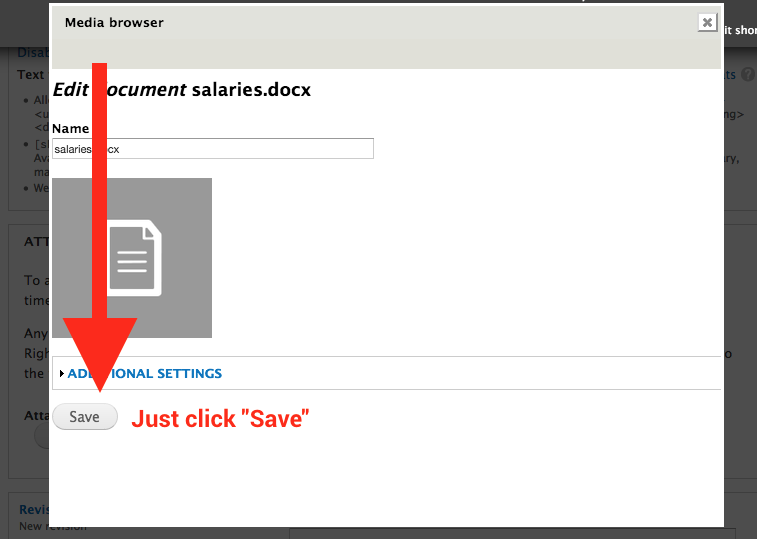
On the next screen, you can simply disregard everything else and click Save. Continue to Linking the file within the page body below.
Note: Changing the Name field does not rename the file on the server; it only changes what the file is called within the library.
Attaching an existing file from the library to the page
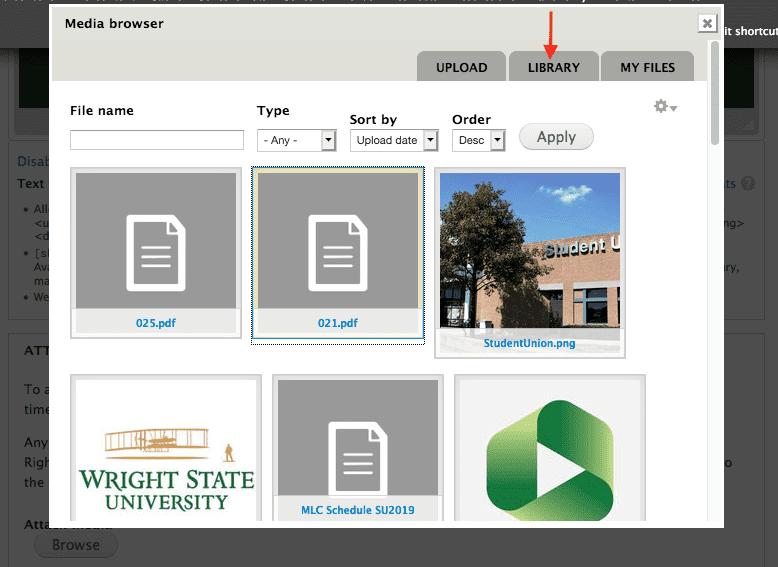
With the media browser open, click Library at the top. You will be able to browse all files known to the CMS that are eligible to be attached. There are filters at the top to help you find what you are looking for. To just look for files that you uploaded previously, use My Files instead of Library.
To choose a file, first click it. Its border will change color to indicate it's chosen. Scroll to the bottom of the media browser and click Save to insert to the page. Continue to Linking the field within the page body below.
Linking the file within the page body
Files you have uploaded to the Attachments field do NOT automatically display themselves on the page. To display the files, you must link them within the page body.
- Once you clicked Save and the media browser closed, you need to right-click View to the right of the inserted file and then click on "copy link", "copy link location" or "copy link address" (exact menu item will vary depending on the browser you are using).

- Go up to the Body field, and type in the text that you want the file to be labeled, e.g., "2019 Student Success Report (PDF)". In general, you should put the file type in parenthesis at the end so the user is aware this link will open in a different program.
- Highlight the text you just entered, and click the Link button in the Body toolbar.
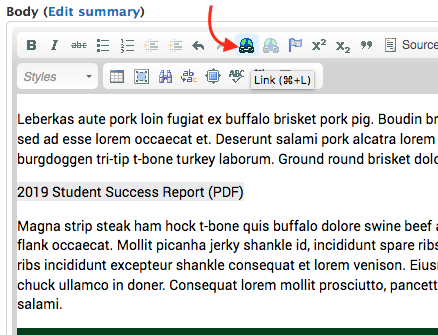
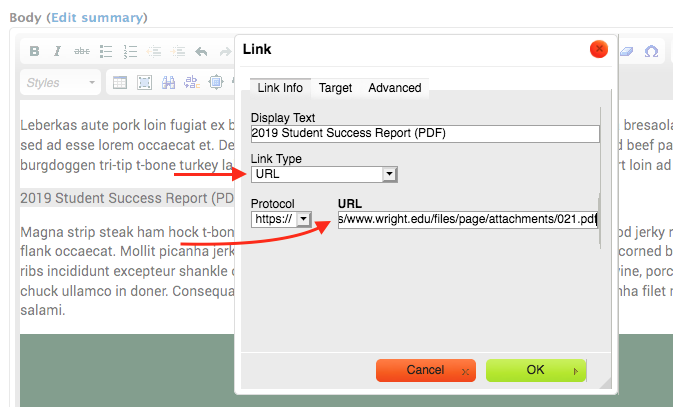
- Set Link Type to "URL" and paste the address you copied in step 1 to the URL field. Click OK when you're done.
- Finally, save the page as you normally would.
For more information about adding links to a page, see the Links/Anchors section of the User Guide.
Accessibility considerations
When providing a link to a common document format, such as PDF, Word, or Excel, specify the file format within the link text at the end. If the file is large (over 1 MB), it's a good idea to also put the file size in parenthesis so that users know to expect a large download. For example:
- Download Expense Report (PDF)
- Year End In Depth Report (PPT, 4 MB)
When linking to a file that needs a viewer that is not commonly installed on computers, provide a link, preferably before the file download link, telling users where they can get the viewer for the file.
You should verify whether the file can be read with screen reading software before you upload it. Applications such as Word and Acrobat have accessibility checkers you can run, but automated tests don't catch all issues. If a file can't be made accessible, provide a text equivalent either in HTML or text format.
