Applications for admission will be reviewed through Salesforce on an app called Reader Rx. Everytime an application is assigned to you or your committee to review you will receive an email notification. The email notification can be turned off at your request.

- Log into Salesforce.
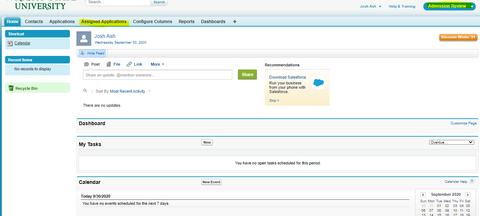
- You should land on your Salesforce home page. Make sure you are on the "Admission Review" app, and then click on the "Assigned Applications" tab.
- You are now using ReaderRx. On this screen you will see two sections, "Not Reviewed Yet" and "Reviewed Applications." The sections are aptly named. "Not Yet Reviewed" are applications assigned to you that you have yet to review. "Reviewed Applications" are applications you have already reviewed.
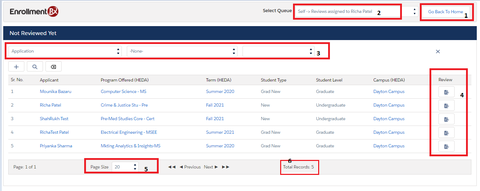
- Click "Go Back to Home" to navigate back to your Salesforce home page.
- Most reviewers will just have the option to review applications assigned directly to them. Some will also have a committee or queue that they belong to. In this instance you may have to switch between reviewing applications assigned to you and assigned to your queue/committee.
- Use the filter criteria to find a specific applicant you are looking to review. First, choose the object you want to search with, contact or application. The contact object typically stores demographic information and the application object holds application information. Then select the specific field you want to search for, like First Name or Program Offered. Then select your operator, such as equals or contains. Finally type in what you are searching for. For example: Contact-First Name-equals-Jayne. If you wish to search by First Name and Program Offered simply click "add criteria." To clear your search results and see the full list of applications assigned, simply click "clear."
- Select the "Review" button on the row of the applicant you would like to review.
- Use the page size to adjust the number of applications you see on the page at one time.
- Shows you the total number of records assigned for your review.
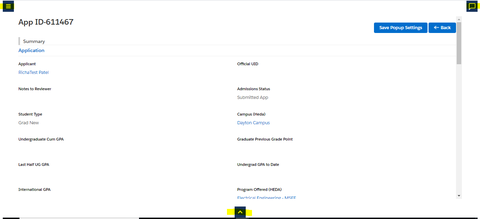
- Click "Review" on the line of the application you want to review. Below is a navigation guide of the screen when reviewing an application:
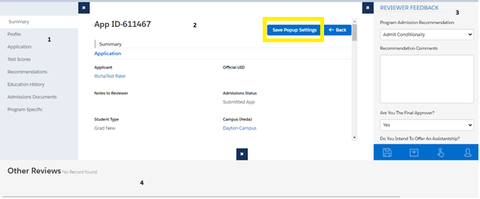
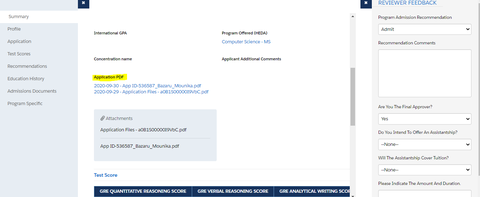
- This sections displays the various components of the application. You can click into each section for additional details about the application. For example, click on "Education History" to see detailed information about the applicants high school or college background.
- The center section is the display screen. As you click into the various components on the application in the first section, you will see the details here on the center section. Like in our first example, when you click "Education History" you will see the details related to that component on the center display screen.
- This is the reviewer feedback section. This is where you will leave your feedback that will ultimately go to your committee members and/or the central admissions offices.
Tip: you can expand the Recommendation Comments box by clicking and dragging the bottom right corner outwards. When you are done reviewing the application click "Assign to Next Reviewer" if you need to pass the application to an additional reviewer, or click "submit" if you are the final person to review the application before sending it back to admissions. If you want to come back to the application later, simply click "save." - If you work on a committee reviewing applications, you will see your colleagues feedback in section 4. Click on the Save Popup Settings to keep the panels stick to your screen rather than clicking on the buttons to open up the panels.
Tip: Note on the screen shot above the hyperlink next to "Application PDF." That link will open all related applications documents in one pdf. For example it will contain the transcripts, essays, etc. in one document.


- The Generate Zip button downloads a zip file with the application id name on your device that will contain all the documents that are attached to the application record.

